
I recently completed the #36DaysofType challenge (done in watercolor) and created posters out of my final alphabet. I discovered a quick and easy trick while digitizing everything and I wanted to share it with you. To utilize this tip, you'll need Adobe Photoshop.
STEP 1: Scan
After letting everything dry completely, scan in your watercolor image. I use an old printer/scanner that I got when I first started college. Not the best, but it does what I need it to do. When I "open" my printer on my computer, my scanner dialog box pops up. I just use the default scanner program. There are a couple settings I select that should be available on any scanner.

- Set the resolution to at least 300 dpi (dots per inch, also known as ppi or pixels per inch). 300 dpi is the standard resolution to print your watercolor image at the same size that you painted it. If you want to print it any larger, you'll need to select a higher dpi.
- For the file format, I default to TIFF. This is a safe bet for printing a high quality image. Find out more about different file formats in this post.
That's it. I don't mess with any other settings because I know I can fix them in Photoshop.
STEP 2: Edit in Photoshop
In the photo above, notice how the watercolor paper isn't a true white? It actually has more of a yellow tint to it. I want it to be true white so I can rearrange and enlarge elements of my design if needed. Here's how to do it.
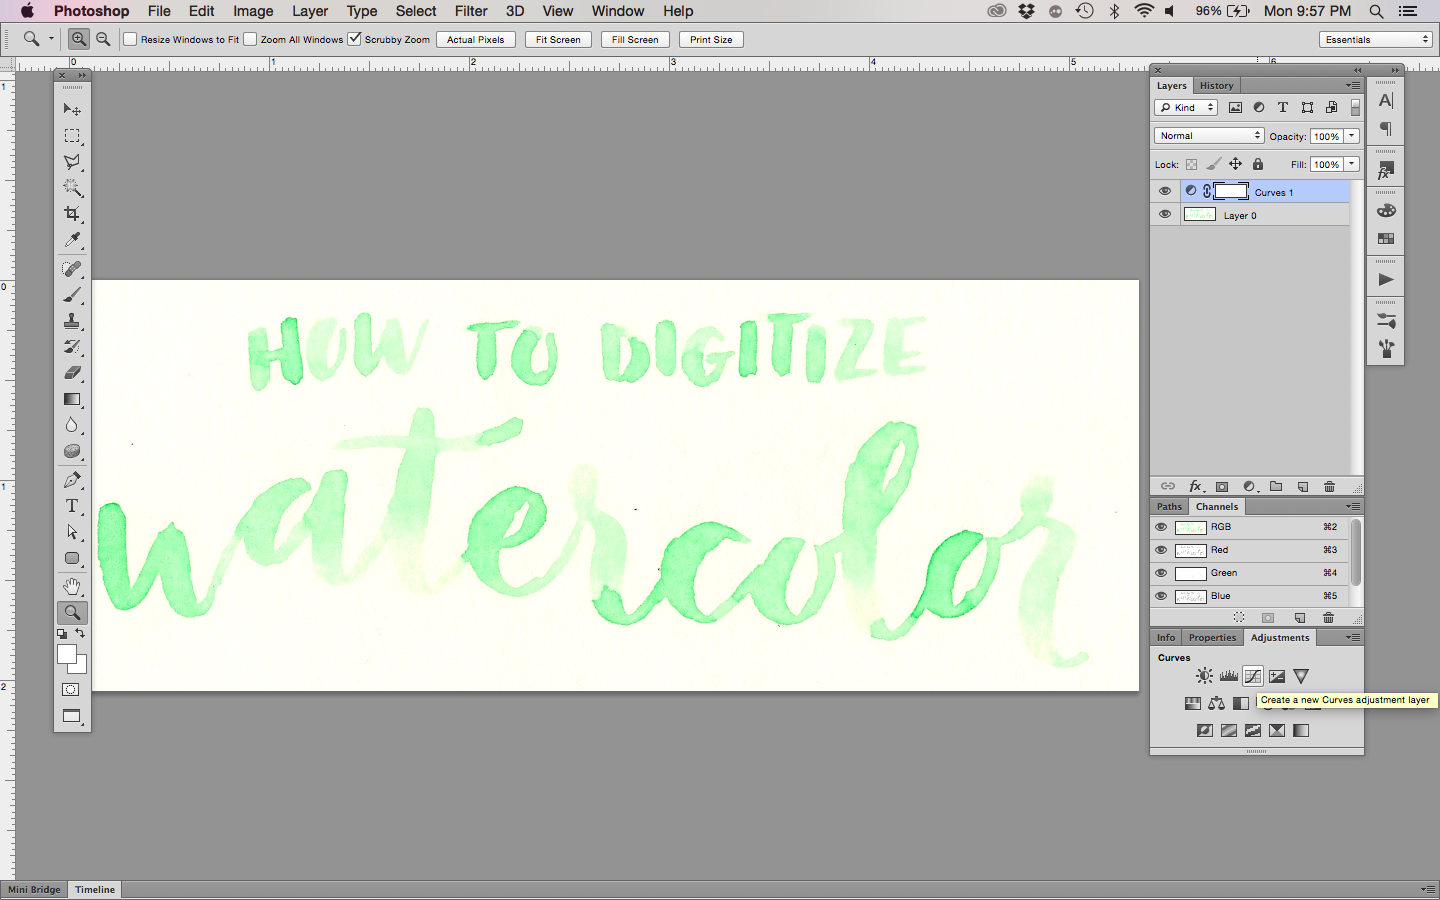


- Create a new Curves adjustment layer.
- Select the white eyedropper in the Curves dialog box. Anywhere you click in your image will now be recognized as the whitest point in your image. Curves will adjust the color of the entire image automatically to achieve this. (Luckily, it doesn't alter the paint colors too much.)
- You might have to click around in a few different areas to get the result you want, but that's all there is to this trick!
Now, one size doesn't fit all. I hate when tutorials preach specific numbers and actions because that's not going to work for everyone. This method was the quickest and easiest way for me to create a digital image that matched my original watercolor pretty closely. You will probably have to experiment with different settings and adjustments to find the perfect method for you, but hopefully this tip gets you started!